Office Address
123/A, Miranda City Likaoli
Prikano, Dope
Phone Number
+0989 7876 9865 9
+(090) 8765 86543 85
123/A, Miranda City Likaoli
Prikano, Dope
+0989 7876 9865 9
+(090) 8765 86543 85


 by exldigital
Connecting your WhatsApp Business account to your Facebook Page unlocks powerful tools for communication, engagement, and conversion. It enables you to show a WhatsApp contact button on your page, receive messages directly, and run WhatsApp ads.
This guide by Exldigital walks you through every step of connecting a WhatsApp Business number to a Facebook Page, including business approval, number linking, and verifying the connection inside Meta Business Manager.
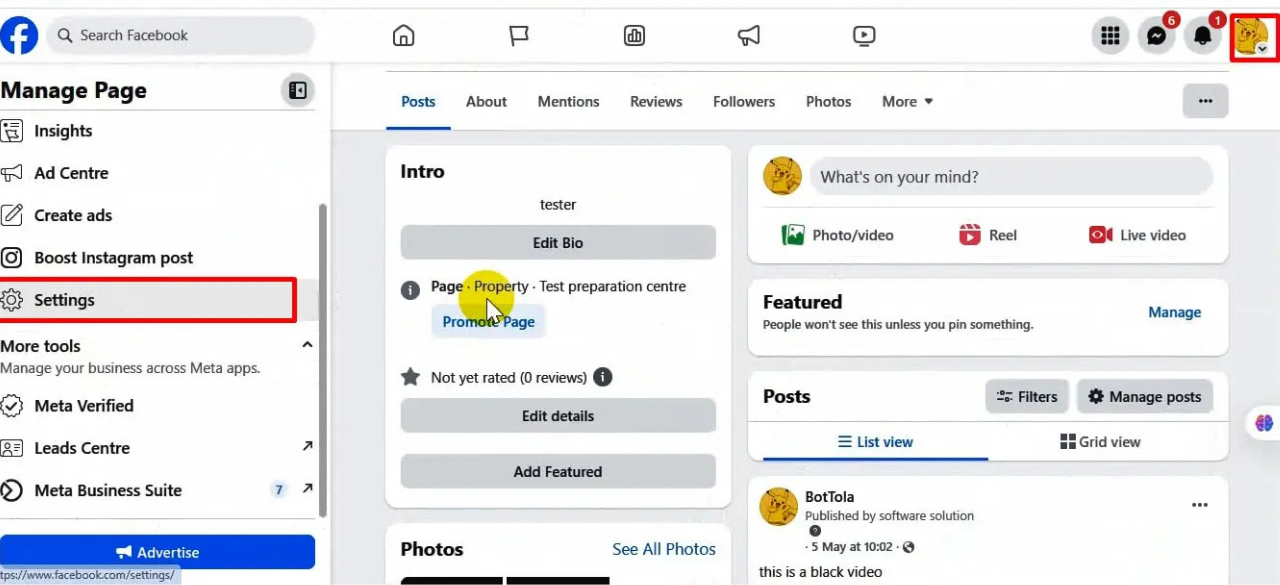
🔧 Step 1: Go to Your Facebook Page Settings
To begin, log in to your Facebook account and visit your Page. On the left sidebar, scroll down and click “Settings.”
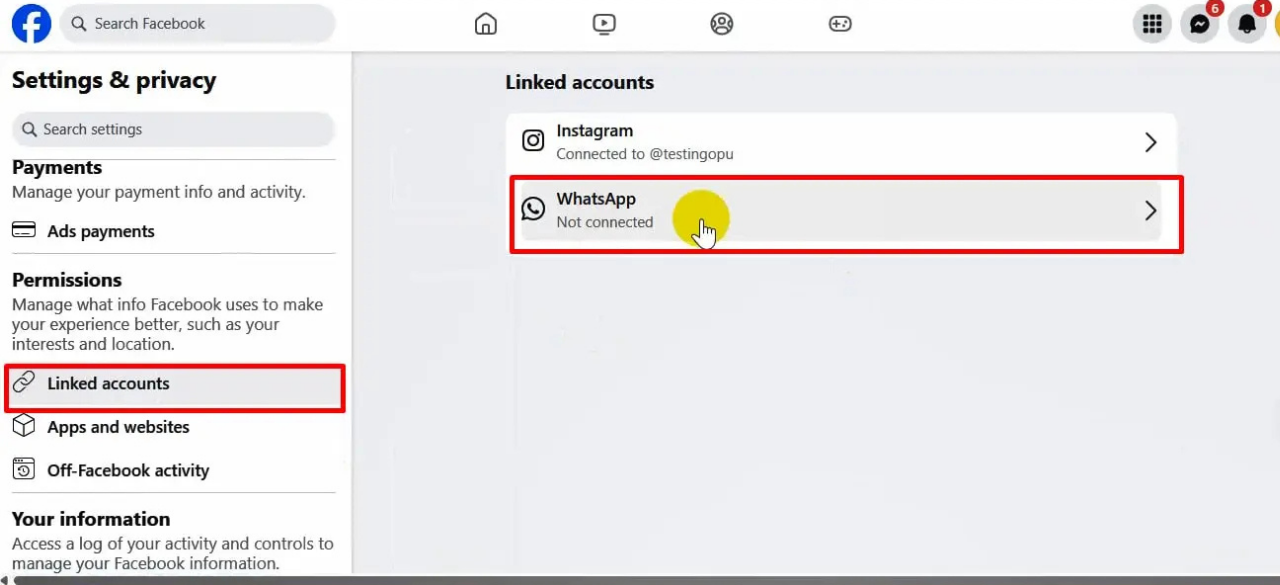
🔗 Step 2: Open Linked Accounts
Under the “Settings & privacy” section, locate and click on “Linked accounts” from the left menu. This is where you can manage your Instagram and WhatsApp connections.
☎️ Step 3: Enter WhatsApp Business Number
Click on WhatsApp under linked accounts. Enter your WhatsApp Business number (with country code) and click the “Send WhatsApp Code” button.

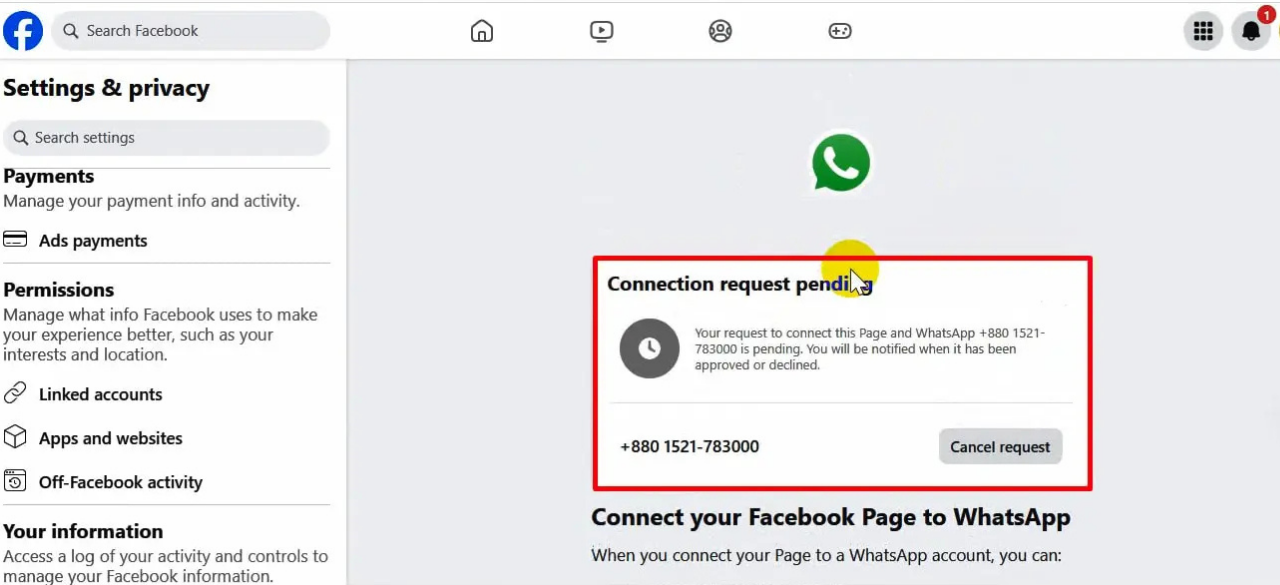
📩 Step 4: Send Connection Request for The WhatsApp Accounts
Once submitted, the system will show “Connection request pending.” This means a connection request has been sent from the Facebook Page to the WhatsApp Business Account. Now please go to your WhatsApp manager and check the Request
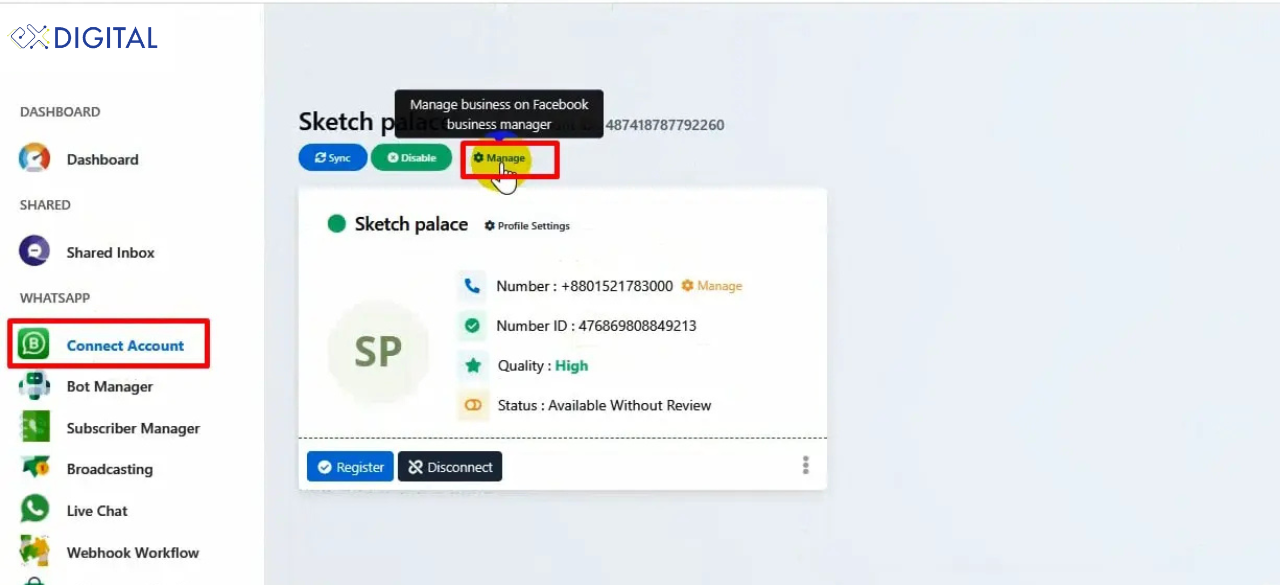
🧩 Step 5: Go to Exldigital Account and Click the Connect Account on WhatsApp and Click the Manage Button
Please go to the Exldigital Dashboard and Connect Account, go to your connected WhatsApp business number, and click on the “Manage” button.
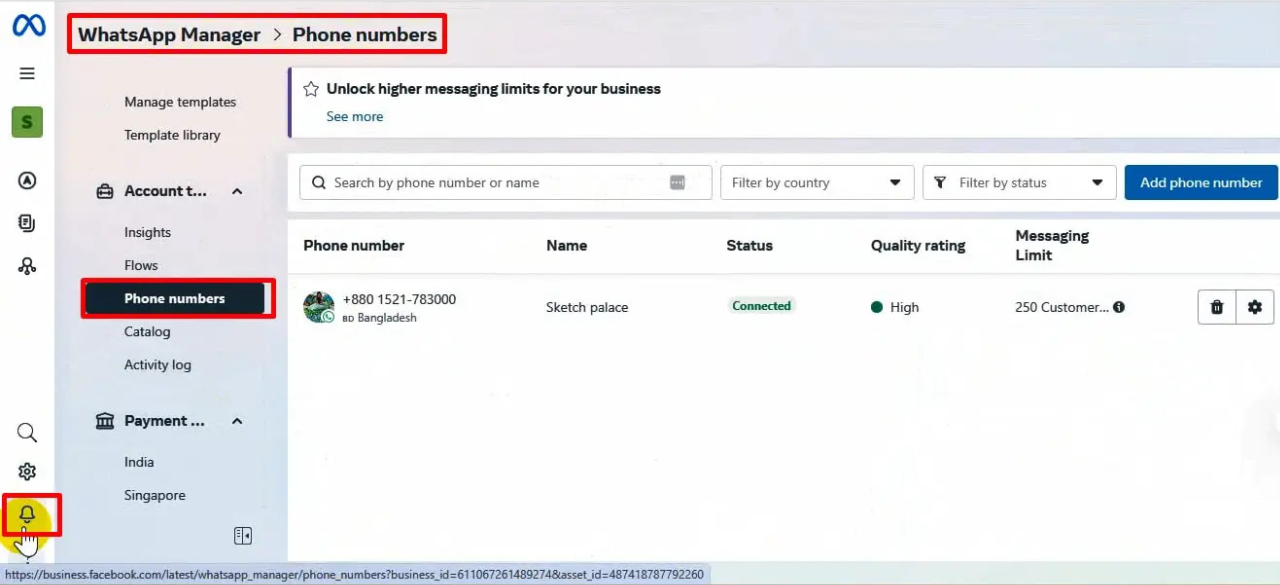
🔔 Step 6: Go to Meta Business Manager → WhatsApp Manager
Visit business.facebook.com and navigate to WhatsApp Manager → Phone Numbers. Here, you’ll see your connected number status. Click the notification bell in the sidebar to find pending requests.
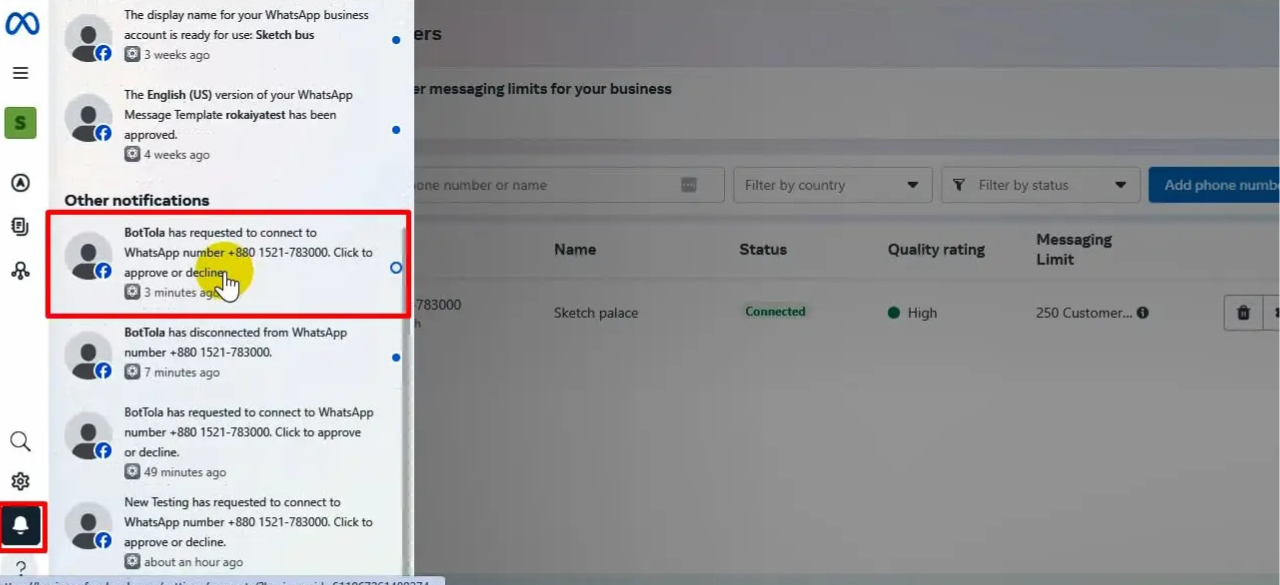
✅ Step 7: Click the Notification to Approve Request
You’ll see a notification like “BotTola has requested to connect to WhatsApp number...” Click it to proceed.
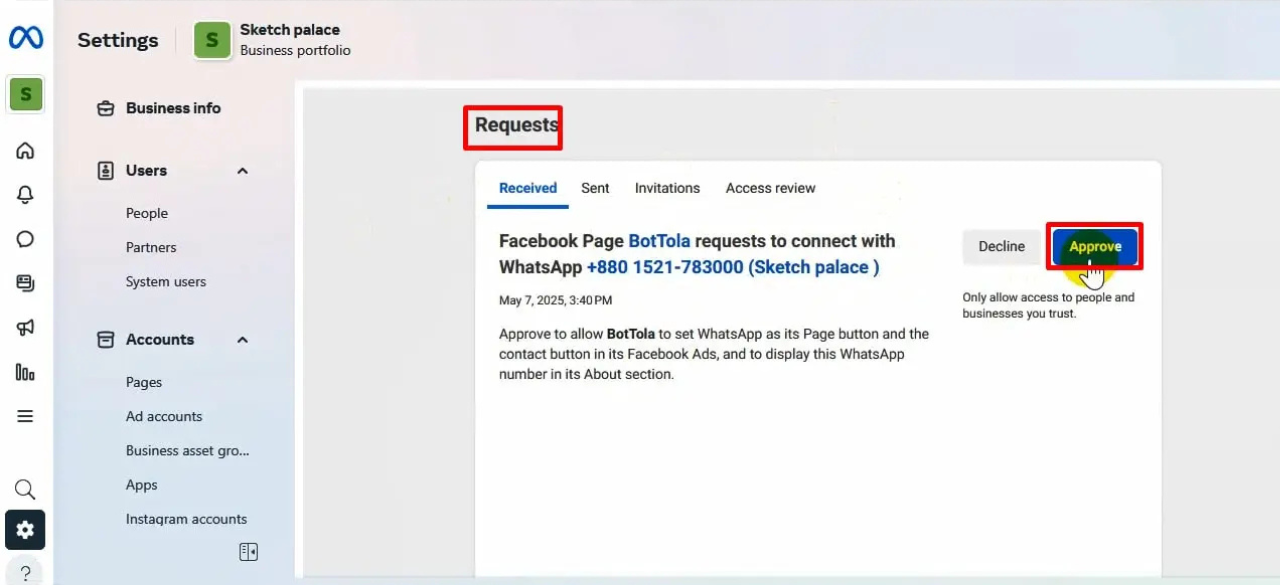
🔓 Step 8: Approve the Connection
Go to the Requests tab under Business Settings → Requests. You’ll see the pending request from the Facebook Page. Click “Approve” to allow the connection.
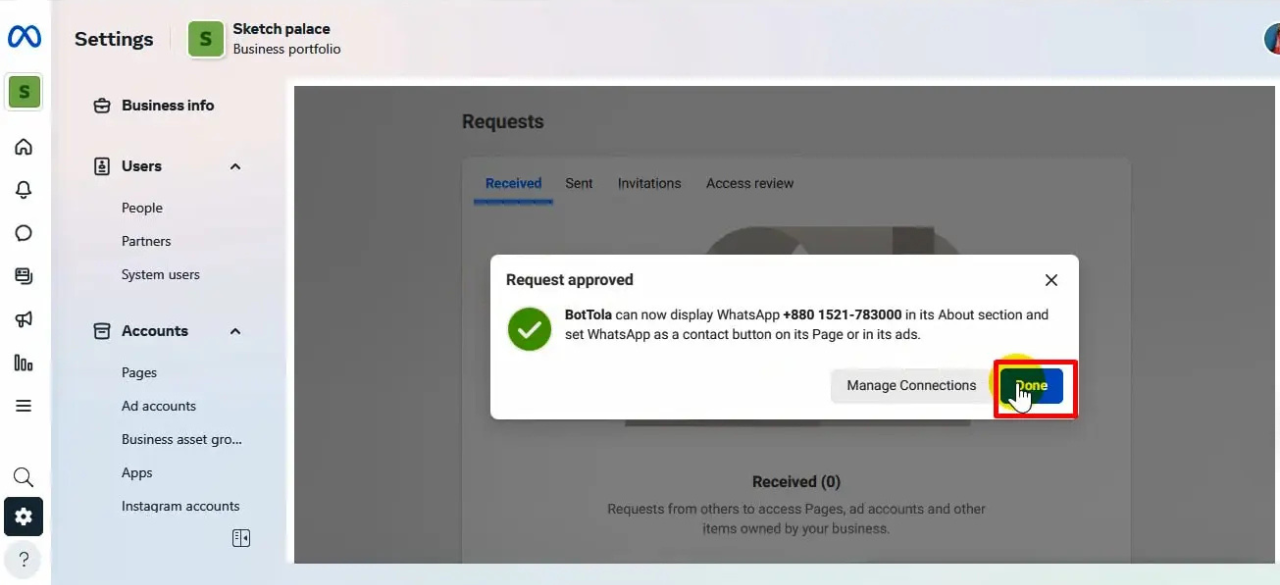
🎉 Step 9: Confirmation of Approval
Once approved, a message will appear:
“Request approved. BotTola can now display WhatsApp +880 1521-783000...”
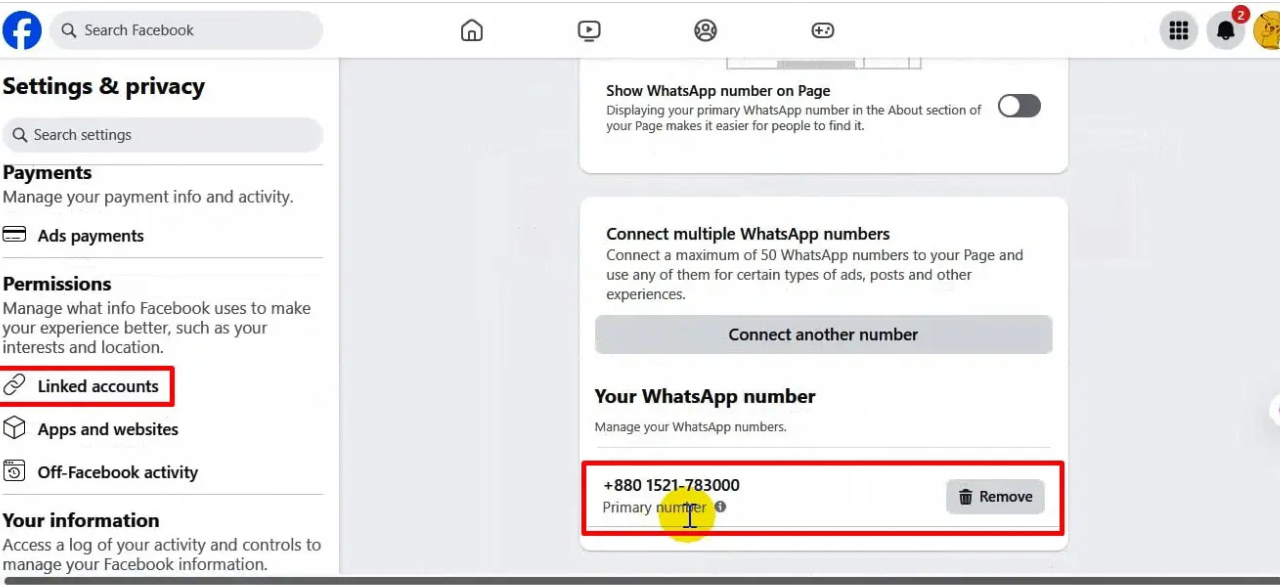
✅ Step 10: Verify the Number is Connected
Return to your Facebook Page settings → Linked Accounts. You will now see your WhatsApp Business number marked as connected.
✅ Final Outcome
Congratulations! Your WhatsApp Business number is now successfully connected to your Facebook Page. You can now:
Display a WhatsApp button on your Page
Run Click-to-WhatsApp ads
Boost engagement with instant conversations