Office Address
123/A, Miranda City Likaoli
Prikano, Dope
Phone Number
+0989 7876 9865 9
+(090) 8765 86543 85
123/A, Miranda City Likaoli
Prikano, Dope
+0989 7876 9865 9
+(090) 8765 86543 85


 by exldigital
Step 1: Create a New Project
1. Navigate to the Google Cloud Console: https://console.cloud.google.com
2. Log in and click the Select a Project dropdown at the top of the page.
3. Click on New Project.
4. Give your project a meaningful name (e.g., "Bizzfair Sync App").
5. Select your Billing Account (if applicable) and organization (if required).
6. Click Create.
Your project is now created and ready for configuration.


Step 2: Enable Required APIs
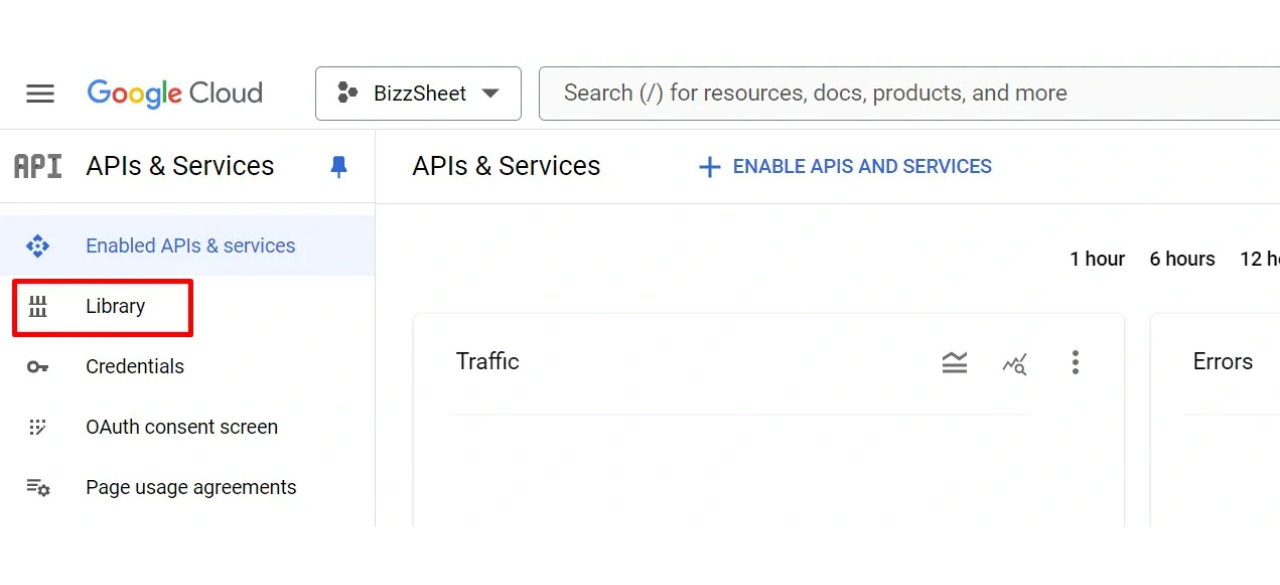
1. In the Google Cloud Console, go to API & Services from the left-hand menu.
2. Click on Library to search and enable the required APIs.
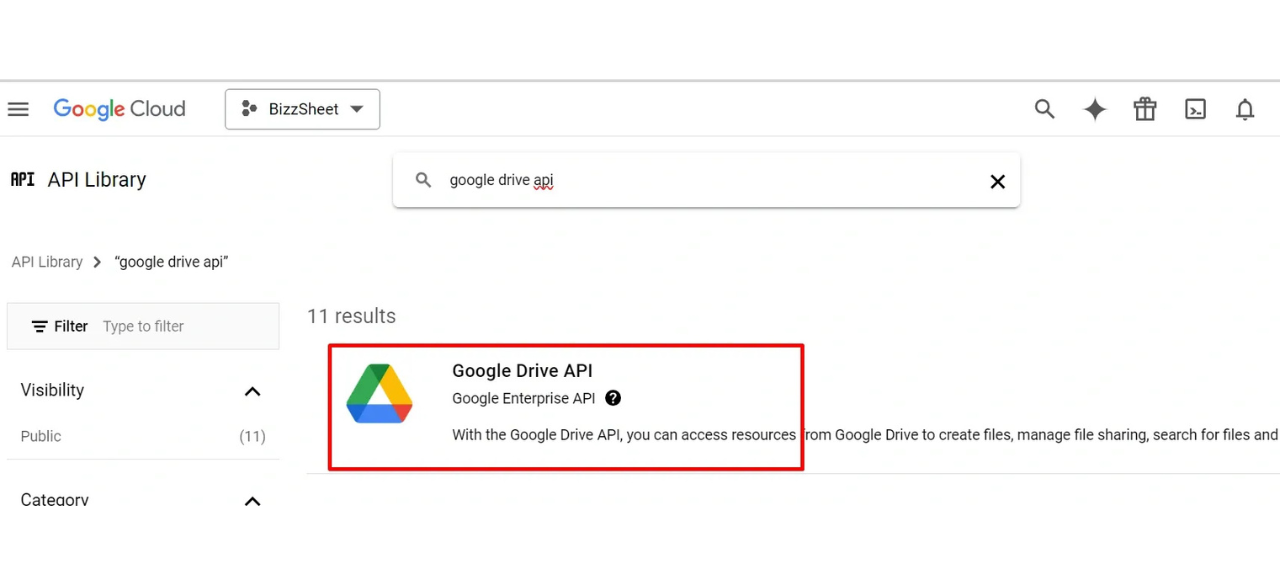
3. Search for Google Drive API:
- Click on Google Drive API and then click Enable.
4. Search for Google Sheets API:
- Click on Google Sheets API and then click Enable.
Both APIs are now activated for your project.


Step 3: Create Credentials
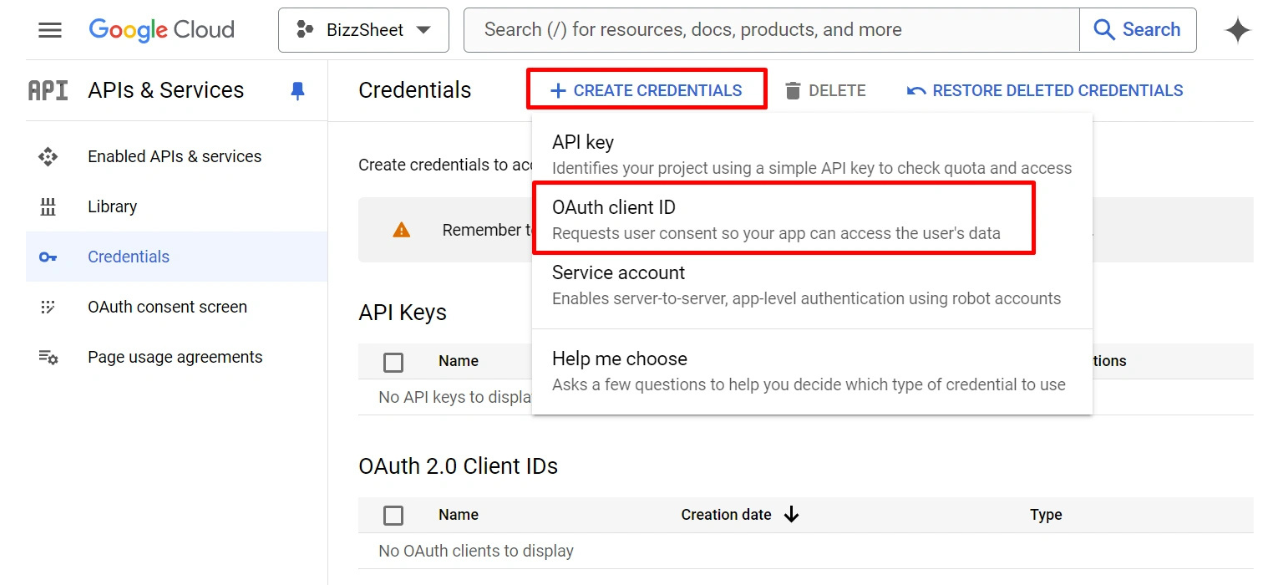
1. Navigate to API & Services > Credentials from the left-hand menu.
2. Click on Create Credentials and select OAuth 2.0 Client IDs.
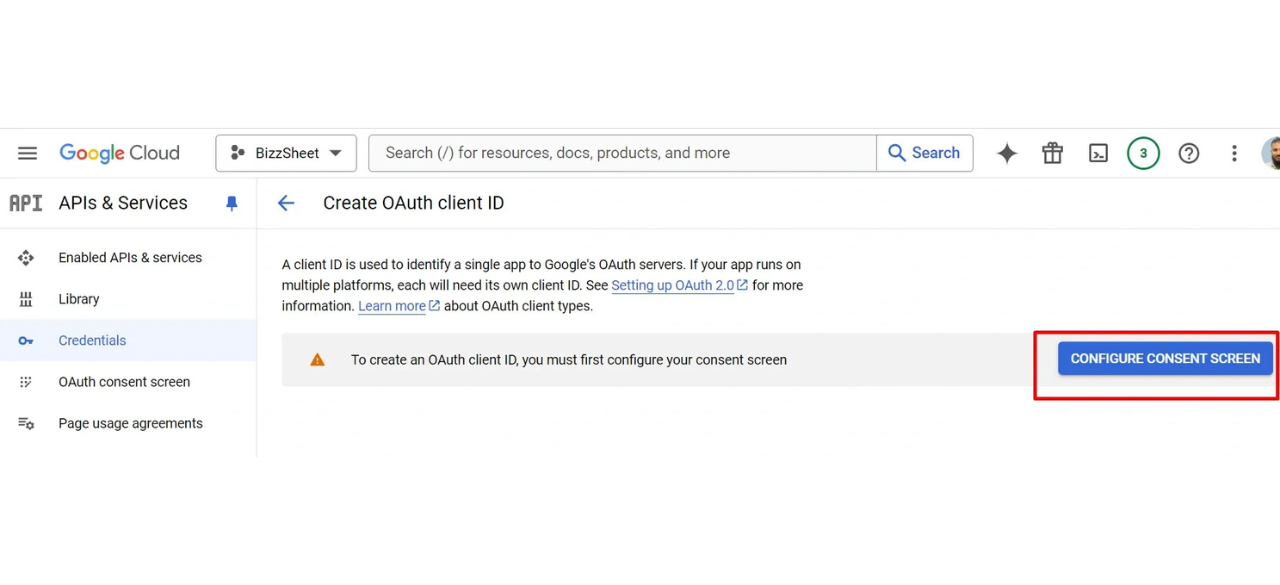
3. A prompt will appear to set up the OAuth consent screen. Click on Configure consent screen.
Step 3.1: Configure OAuth Consent Screen
1. Choose User Type: Select External if your app is for users outside your organization.
2. Click Create.
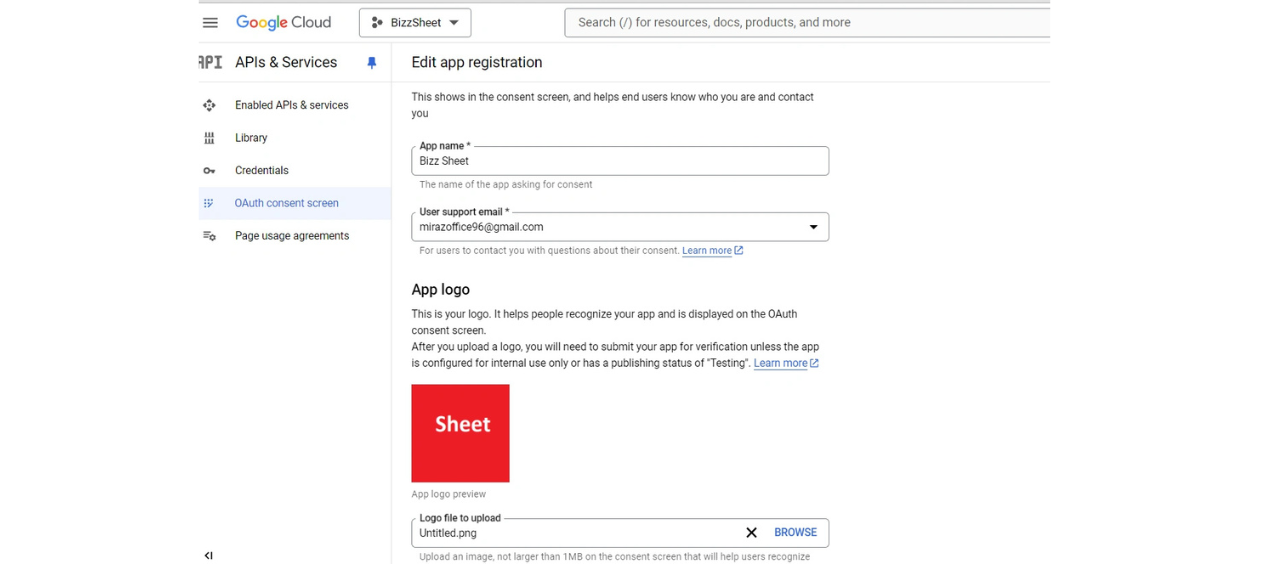
3. Provide the following details:
- App Name: Choose an appropriate name for your app.
- User Support Email: Enter your support email address.
- App Logo: Upload your app's logo.
- App Domain: Add your app's homepage.
- Authorized Domains: Specify the authorized domain(s) where your app will be hosted.
- Developer Contact Information: Enter your contact details.
Once completed, click **Save and Continue**.


Step 3.2: Generate Client ID and Secret
1. Return to the Credentials page and click Create Credentials > OAuth Client ID.
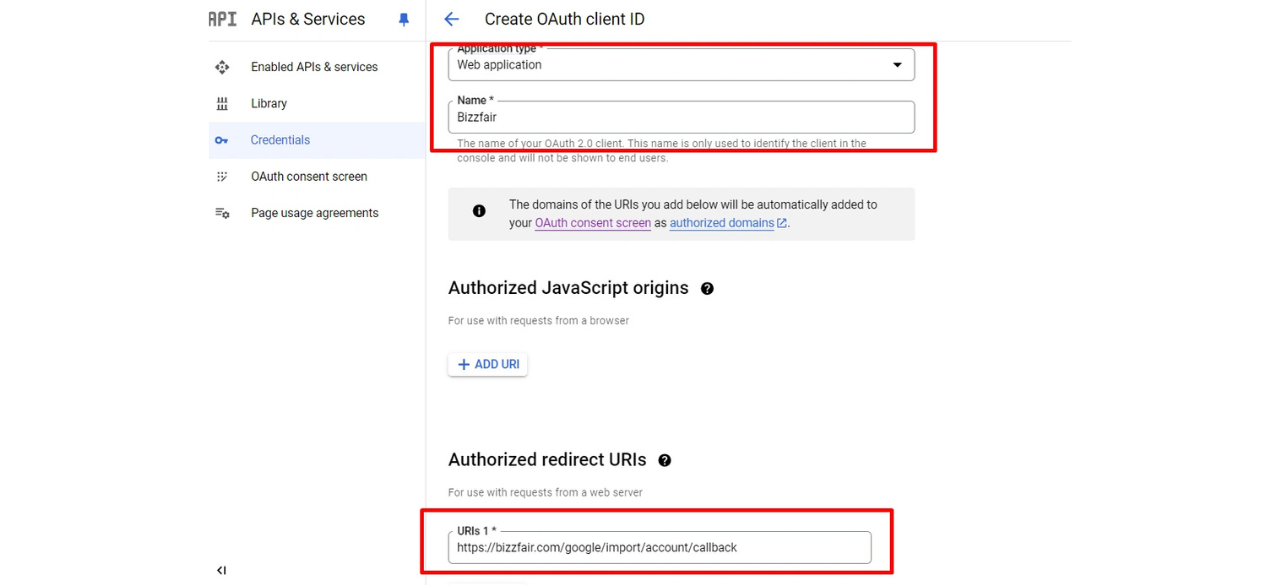
2. Choose Application Type:
- For web apps, select Web Application.
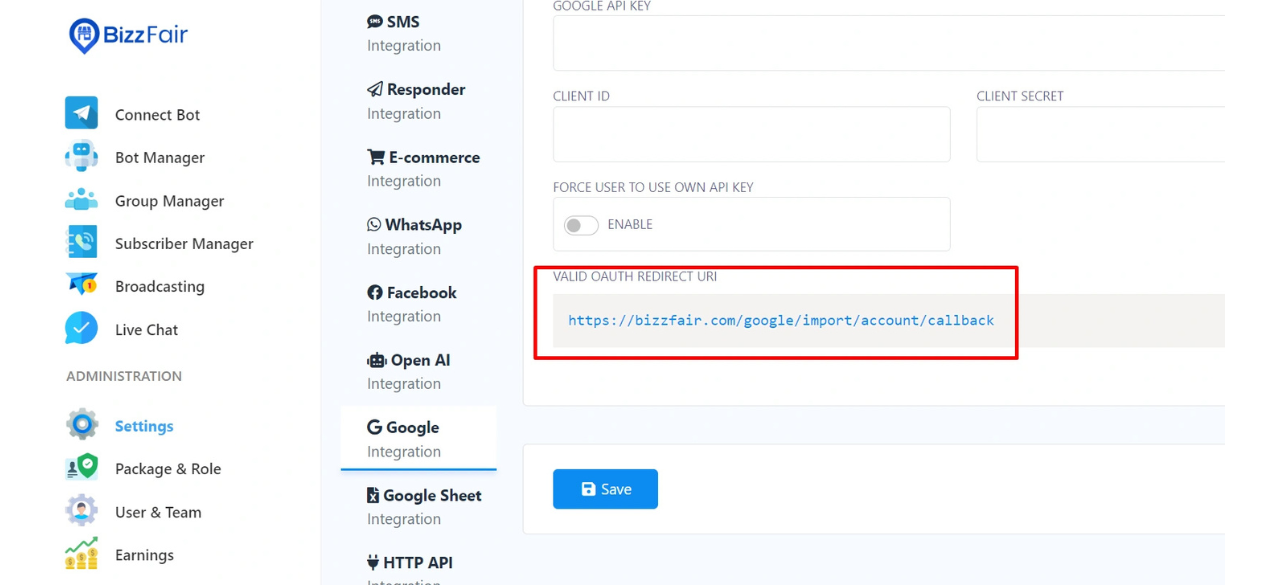
3. Fill in the required fields, including Authorized Redirect URIs:
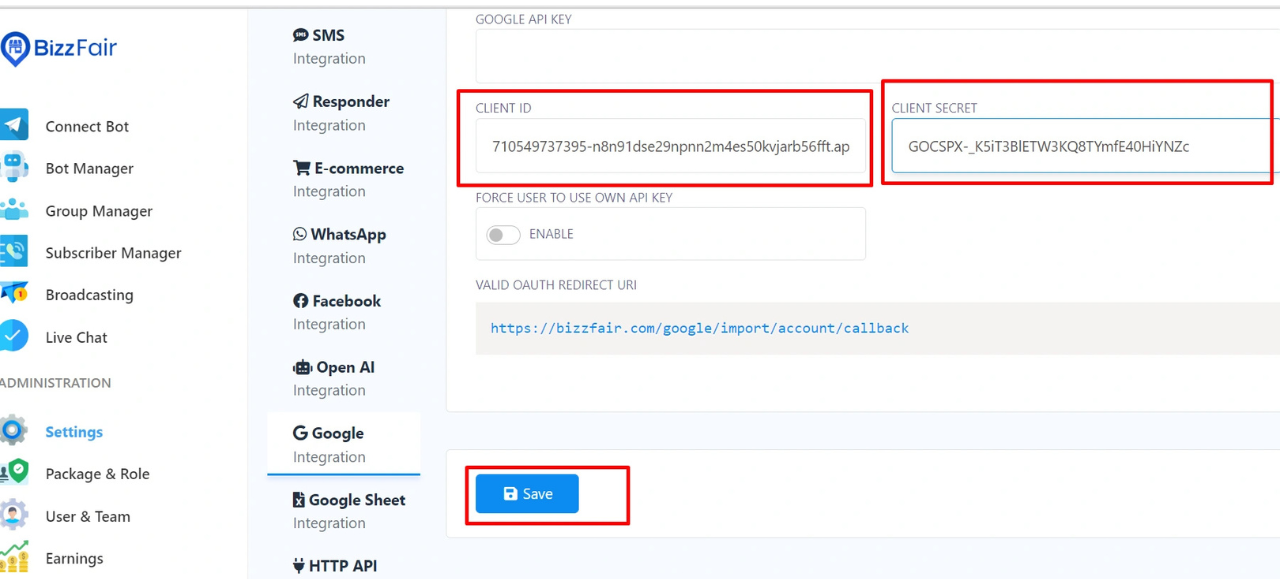
- You can find this in your system under Settings > Google Options.
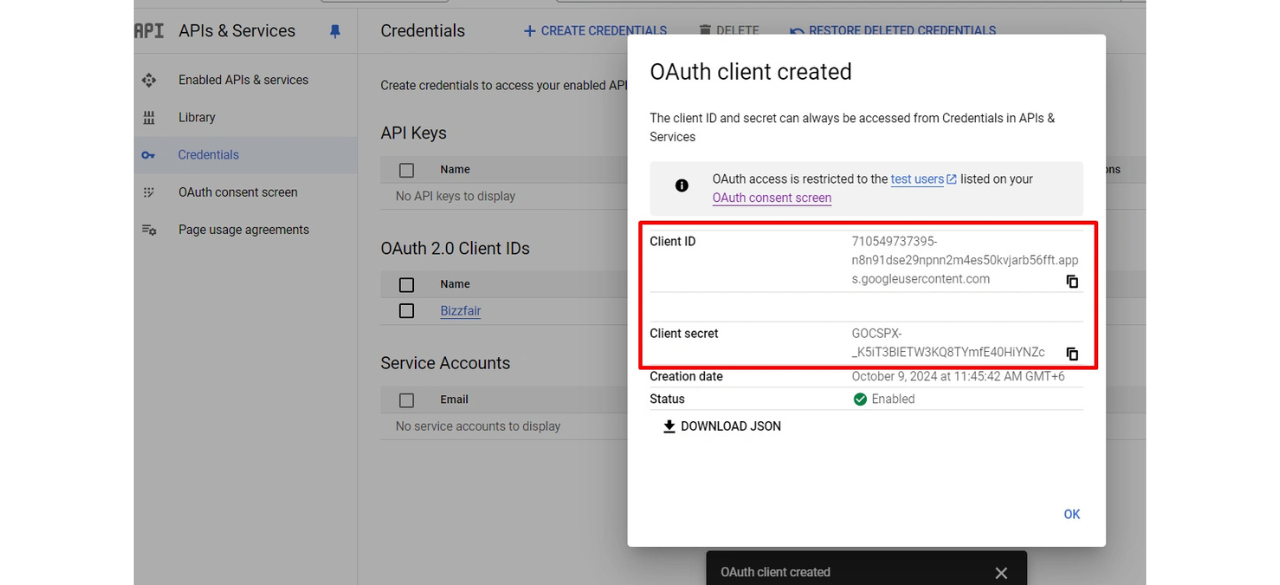
4. Click Create.
Your Client ID and Client Secret will be generated. Copy these and input them into your system in the appropriate fields, then save.


Step 4: Submitting Your App for Review
1. Go to the OAuth Consent Screen and scroll down to the Publishing Status section.
2. Click on Publish App to publish your app.
3. Click Edit App, review the provided information, scroll down, and click Save and Continue.


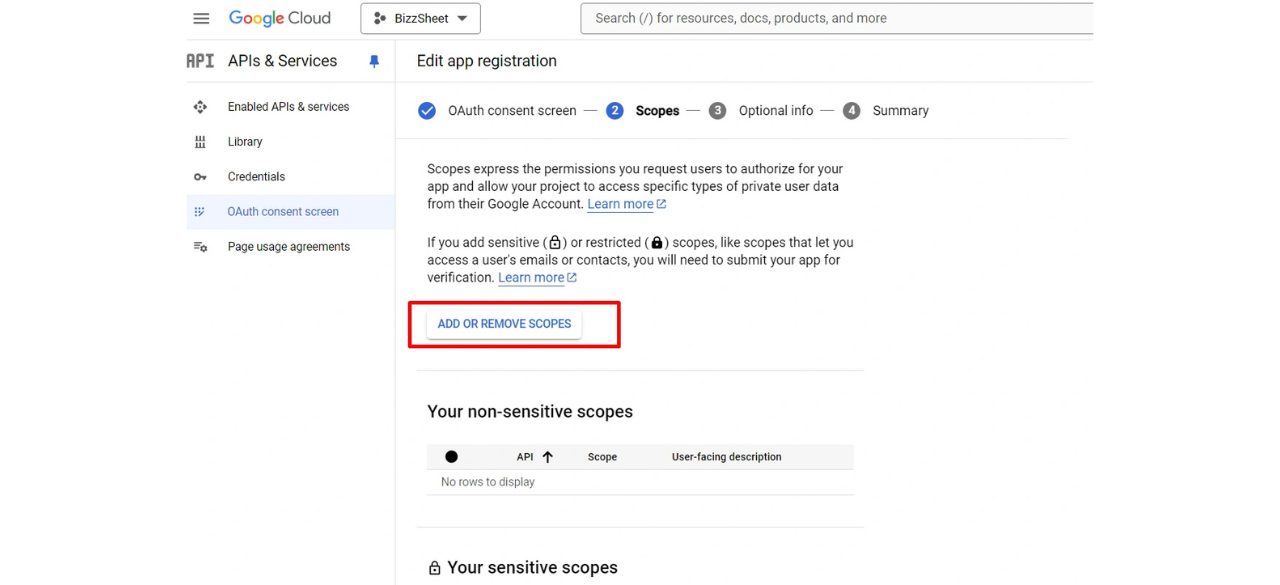
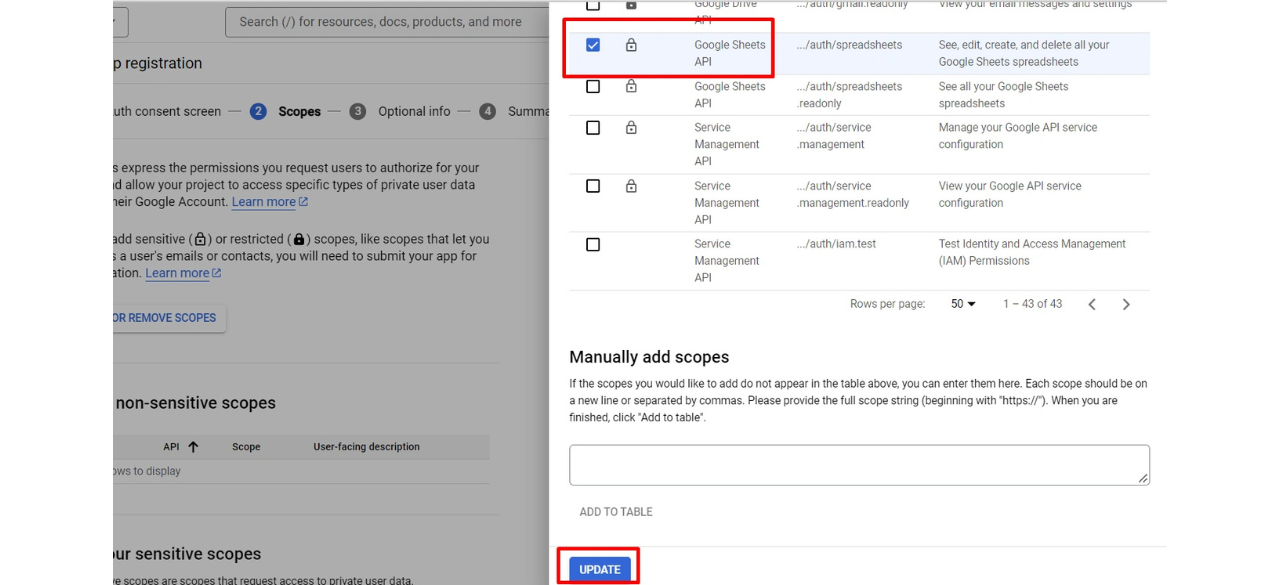
Step 4.1: Add and Justify API Scopes
1. Under Scopes, click Add Scope. Add the relevant permissions your app requires, including:
- https://www.googleapis.com/auth/userinfo.email
- https://www.googleapis.com/auth/userinfo.profile
- https://www.googleapis.com/auth/drive.file
- https://www.googleapis.com/auth/spreadsheets
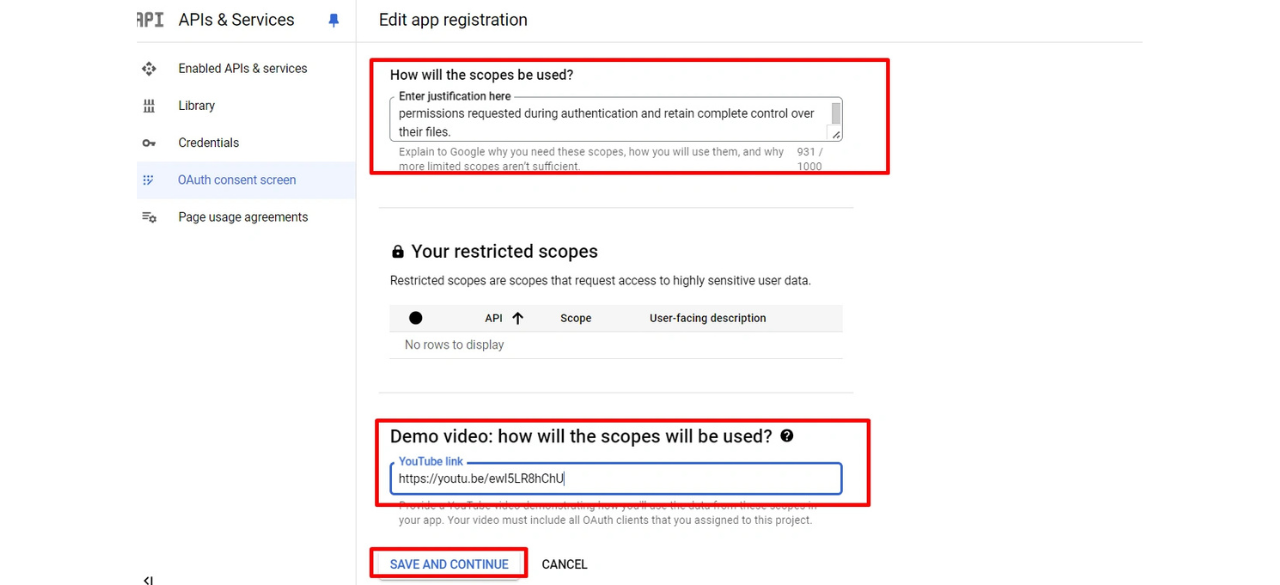
2. Under How will the scopes be used?, describe how your app will use each requested Google API.
3. Create a demo video showing how the scopes will be used. Upload the video to YouTube and provide the link.
Here is a demo video https://youtu.be/sMjlt0LlqCQ , You must need to screencast your own video with your own app, then provide it for Google review.
Click Save and Continue when done.

Step 4.2: Provide Privacy Policy and Terms of Service
1. Ensure you have valid URLs for your app's Privacy Policy.
2. Enter these URLs in the corresponding fields and click Save and Continue.

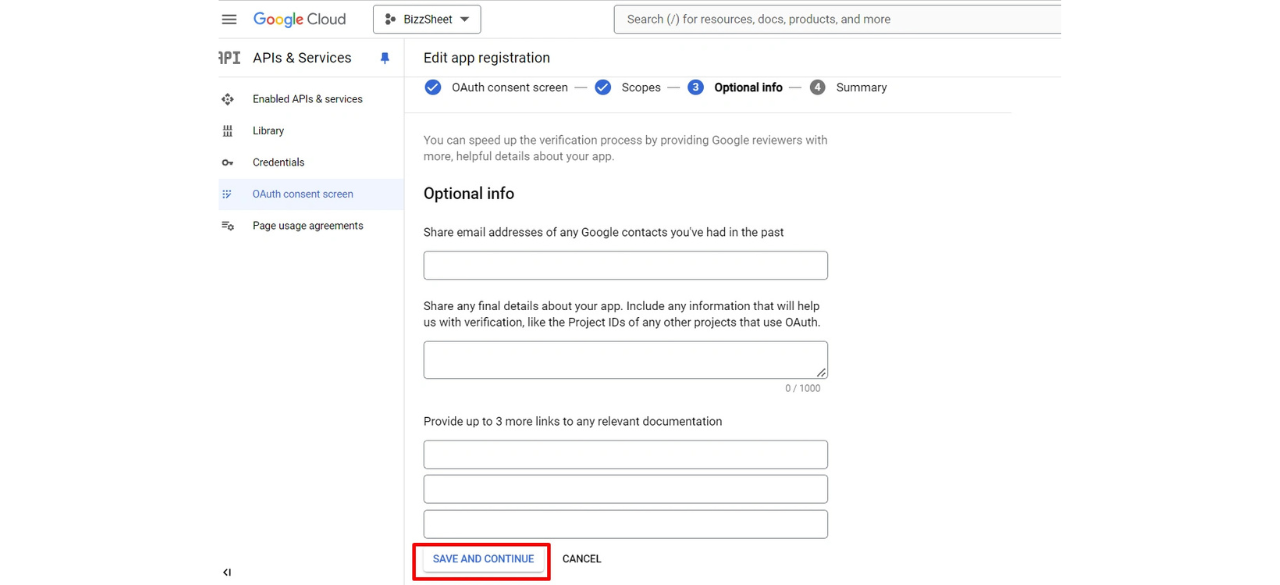
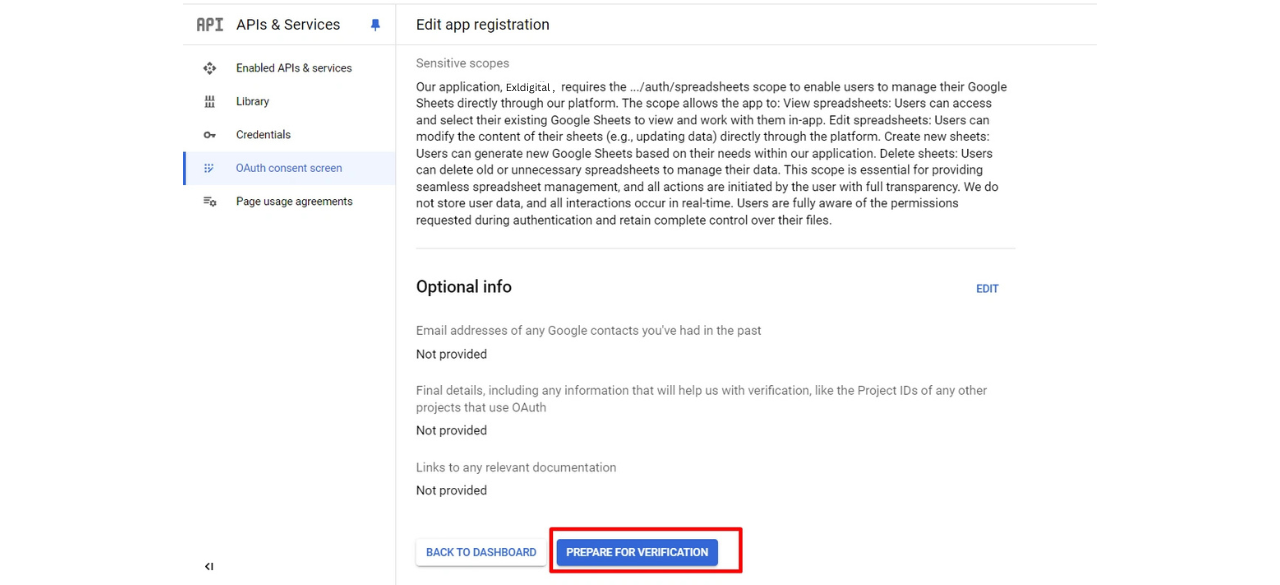
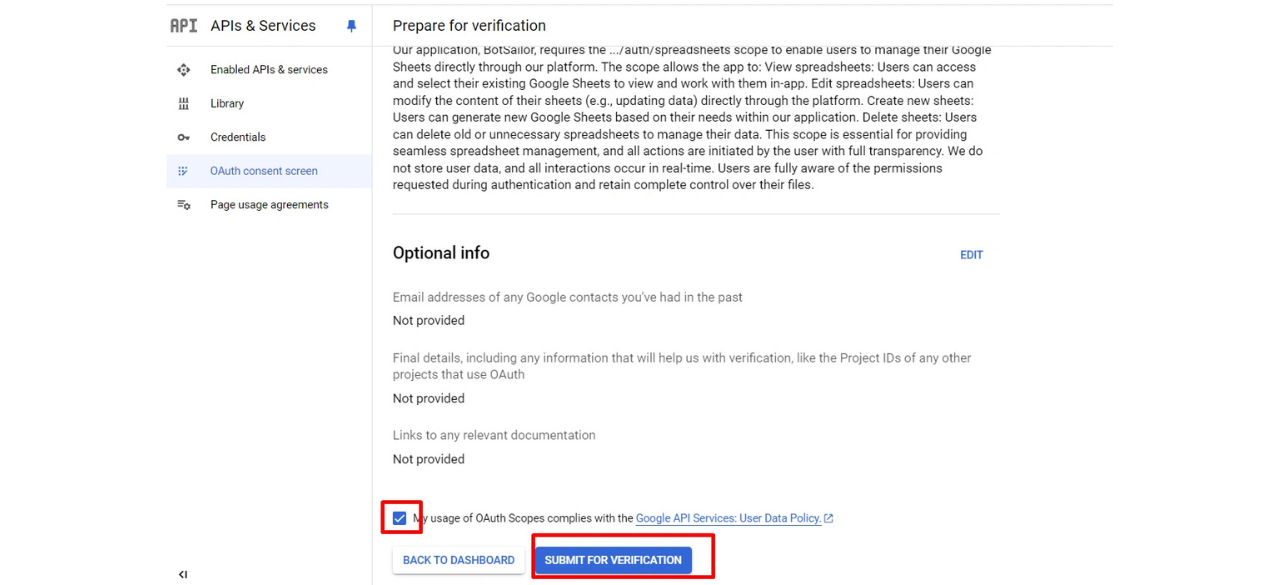
Step 4.3: Submit for Verification
1. Once the verification details are complete, click Submit for Verification.
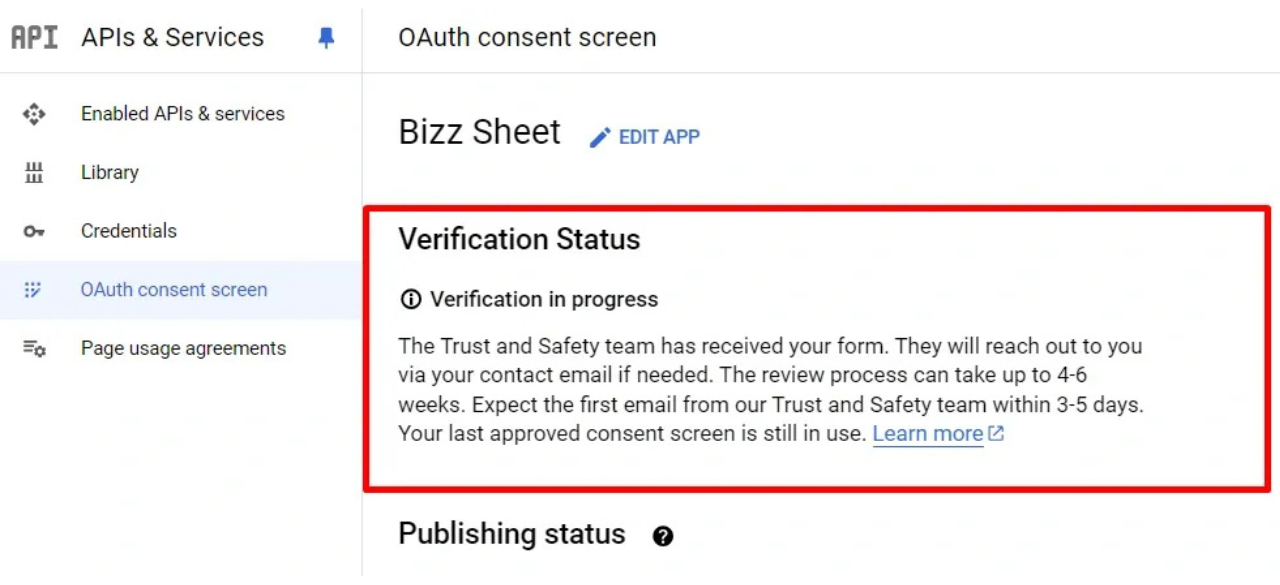
Step 5: Verification Process
Google will now review your app to ensure it complies with their policies. The review process may take several days to a week. You will receive email notifications if additional information is needed or when your app is approved.